Once installed and ready to go, commercial heat lamps can be a wonderful addition to a foodservice operation. But how do you actually get these babies installed … correctly? Well, the first thing to note is that there’s no universal instruction manual that applies to all commercial heat lamps. You should always follow the manufacturer’s installation guidelines. With that said, there are a few tips that every operation should keep in mind come time to install their commercial heat lamps.
Get precise with height
Commercial heat lamps should be hung at the manufacturer’s recommended clearances. This is for safety, but it’s also tied to performance. Hang a heat lamp too high above the surface below, and the food you’re holding may cool too quickly (or risk dipping into the “danger zone”). Hang the heat lamp too low, and the intensity of the heat can easily continue to cook (and dry out) the food you’re holding.
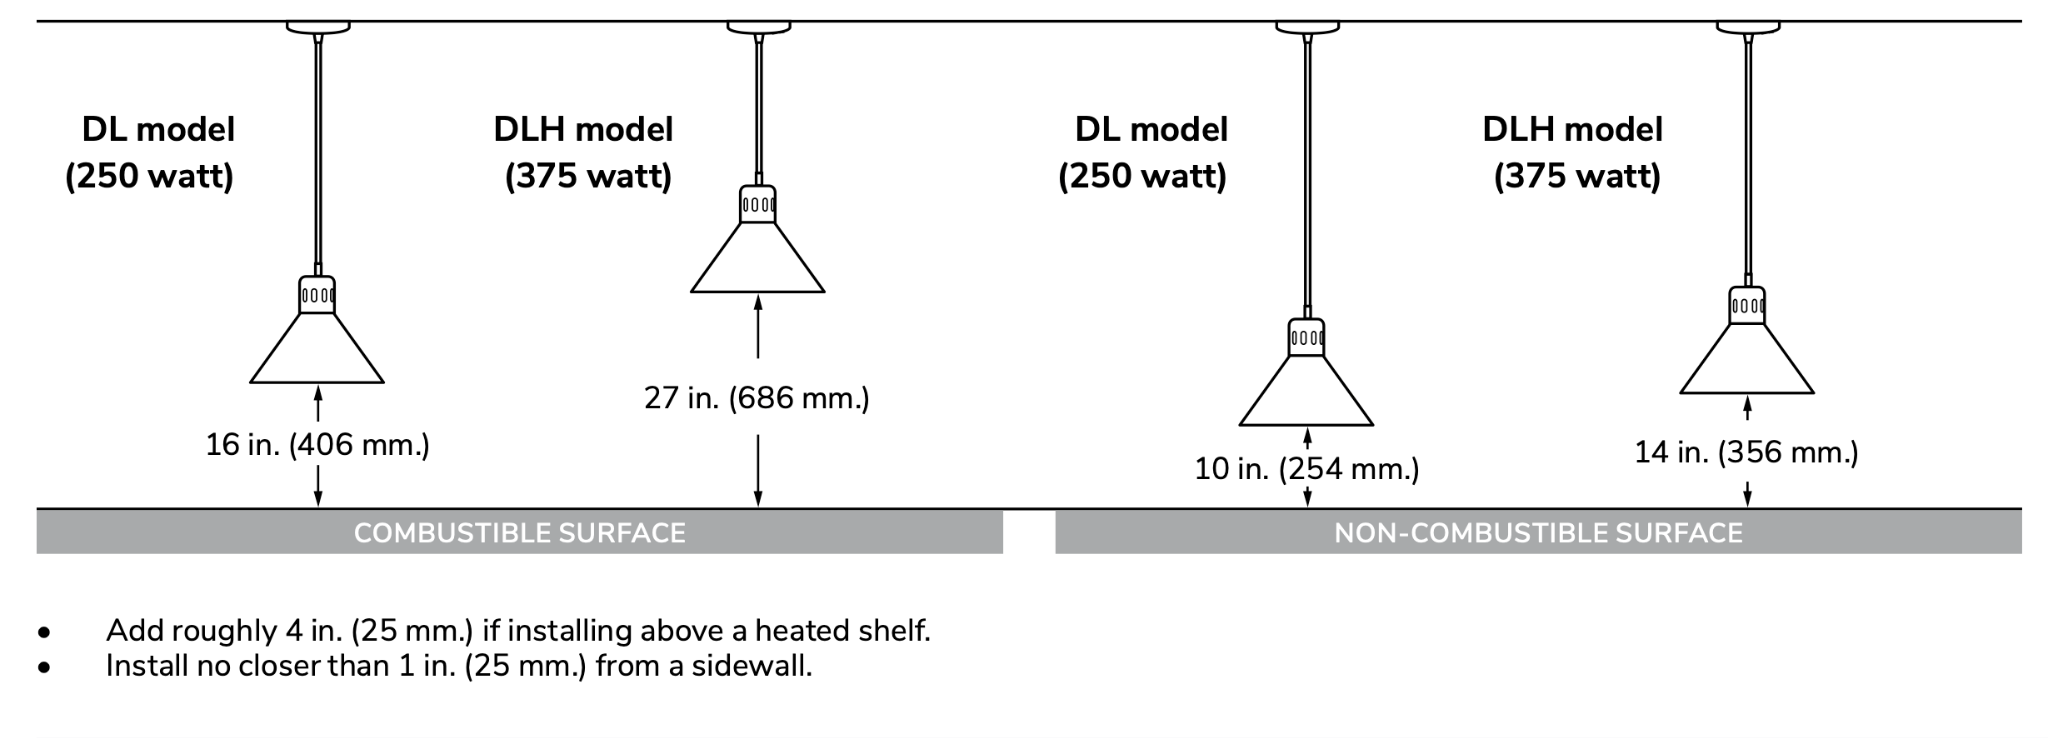
Additionally, when you review the manufacturer’s recommendations for your specific heat lamp, you’ll want to pay close attention to the details. Clearance recommendations vary depending on a ton of factors, such as the surface you’re hanging your lamp above (combustible vs. non-combustible), mount style, watt capacity of the unit, shade height, ambient conditions, the inclusion of supplemental heat and much more. There are also hanging recommendations for distances from sidewalls and between multiple heat lamps. Getting all the specifics right takes a bit more attention, but it makes all the difference between a successful and unsuccessful install.
Example of Hatco recommended clearances:
Measure twice … and do it early
When it comes time to install any commercial heat lamp, the importance of measuring cannot be overstated. Again, you want to be sure you have your clearances and hanging heights just right during the actual installation. However, there are a lot of heat lamps where it’s absolutely critical that you get your measurements right before any heat lamp purchasing happens. Here’s why.
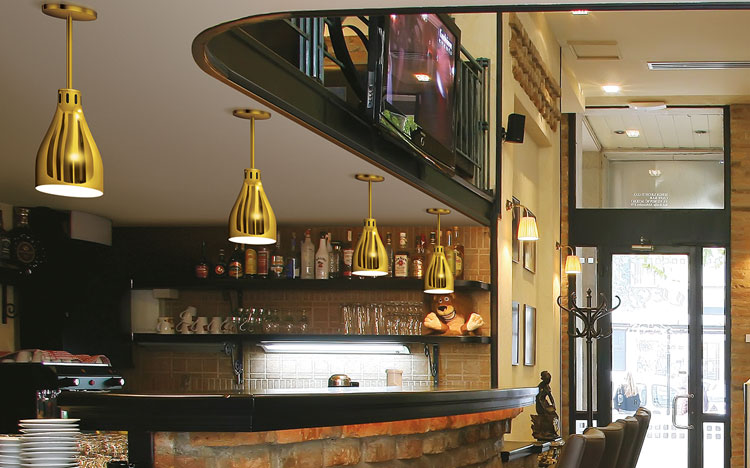
The custom nature of heat lamps (read: no returns) aside, heat lamps are available in different mounting styles. Hatco, for example, offers stem, cord, adjustable stem and retractable cord mounts. Here’s a visual to help keep those straight in your brain:
Visual brain break to illustrate Hatco mount styles:
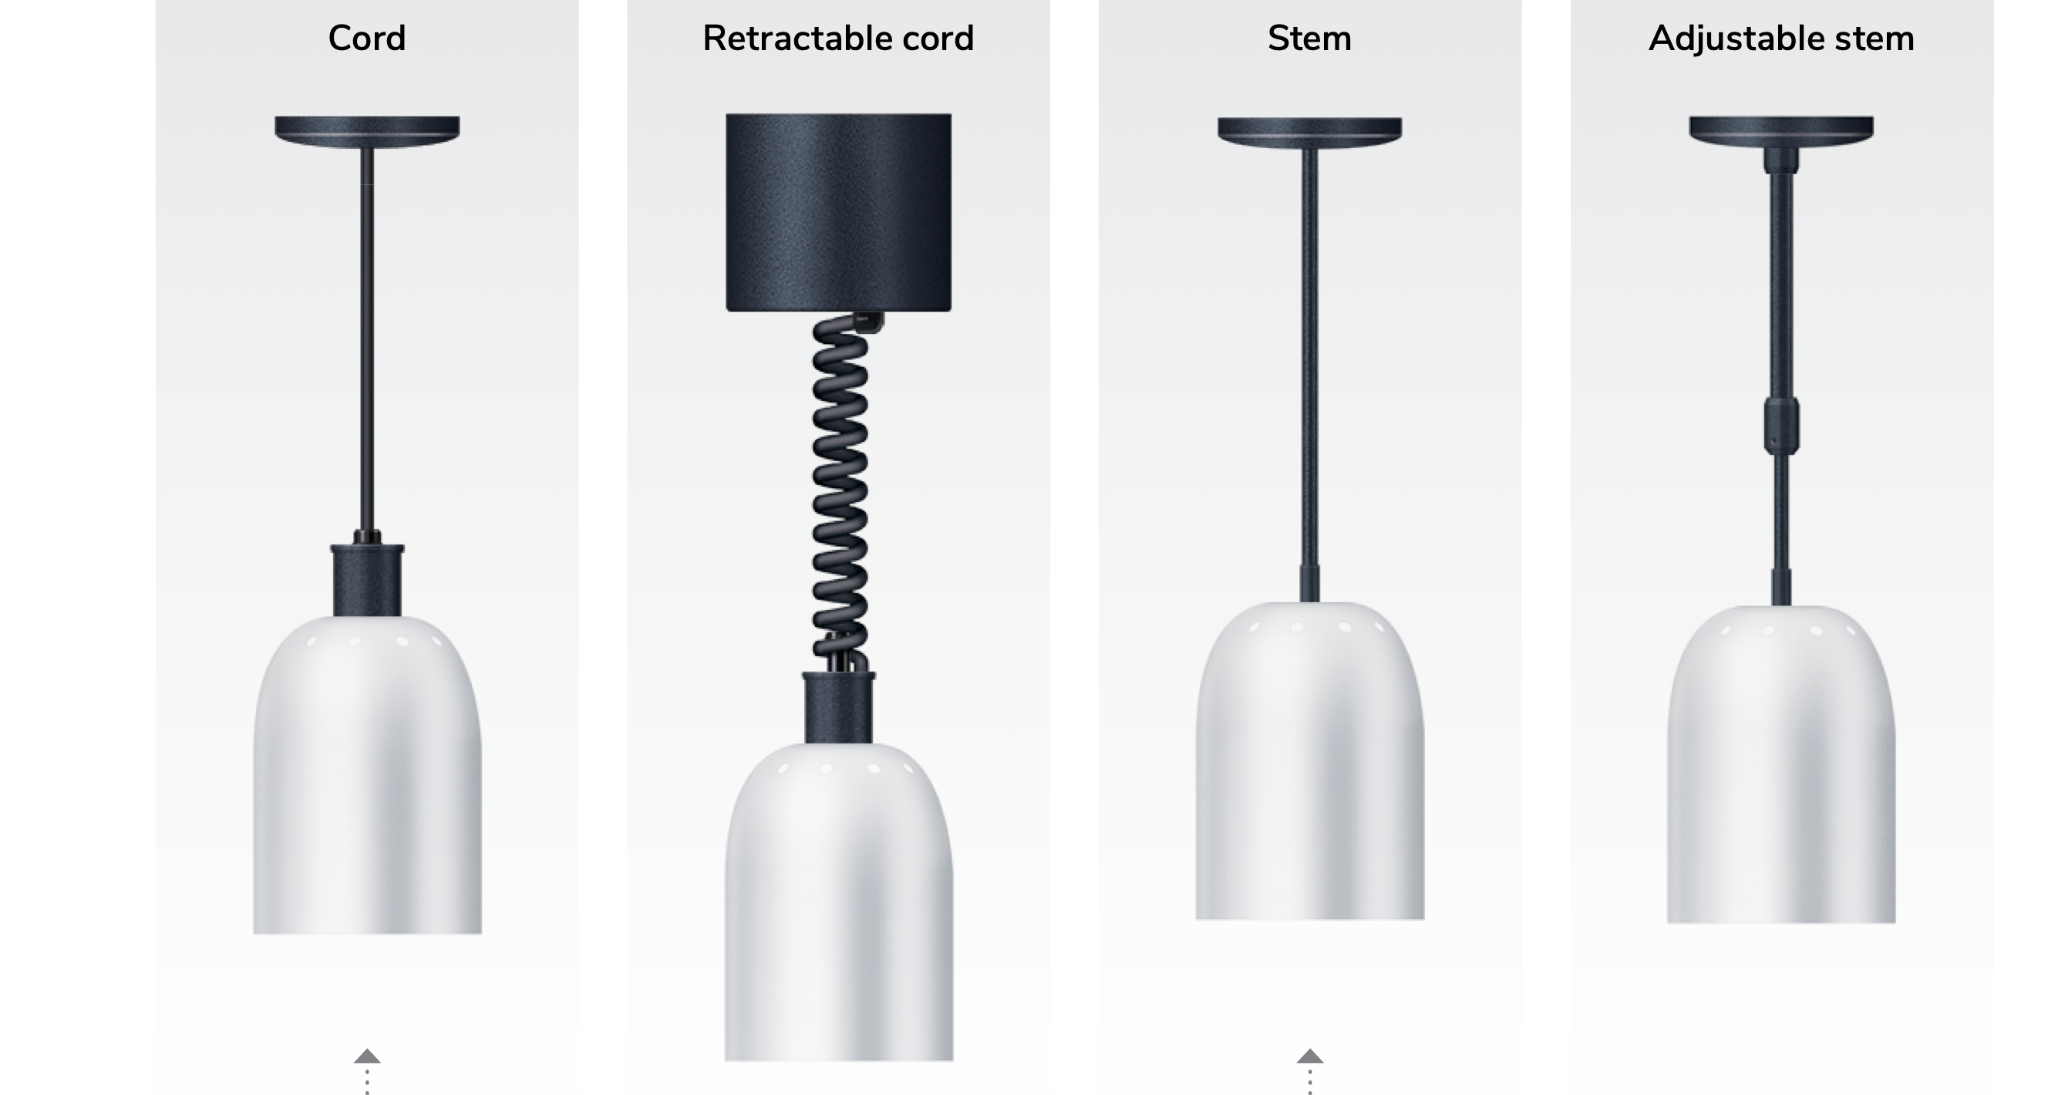
Retractable cord mounts offer the most flexibility, allowing you to expand and contract the unit (within a pretty generous range) after it’s been installed. However, that’s not the case with other options. Stem mounts provide 100% fixed clearances and cannot be adjusted at or after install, period. Cord mounts offer a similar level of flexibility, but technically you could order a little extra cord length and trim it in-field if you’re nervous about getting your measurements perfect upfront. And lastly, adjustable stem mounts fall somewhere in the middle. You can move the stem up or down (within a range) during install — but once you decide on a height, it’s locked in for good.
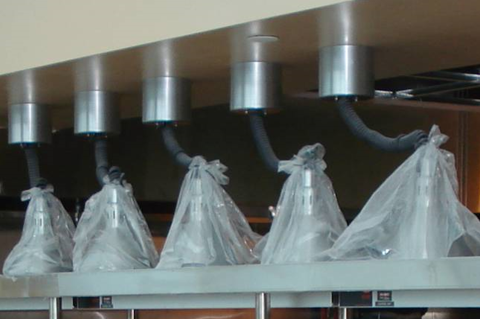
So, what’s the point we’re trying to make with this detailed example? Well, the point is — the majority of heat lamp styles don’t offer a ton of flexibility at the install stage. Therefore, if you don’t order your commercial heat lamp with the right length mount from the get-go, no amount of measuring at install will save you. After all, you’d hate to find yourself in a predicament like the photo below captures!
Example of an install doomed from the beginning:
To track or not to track?
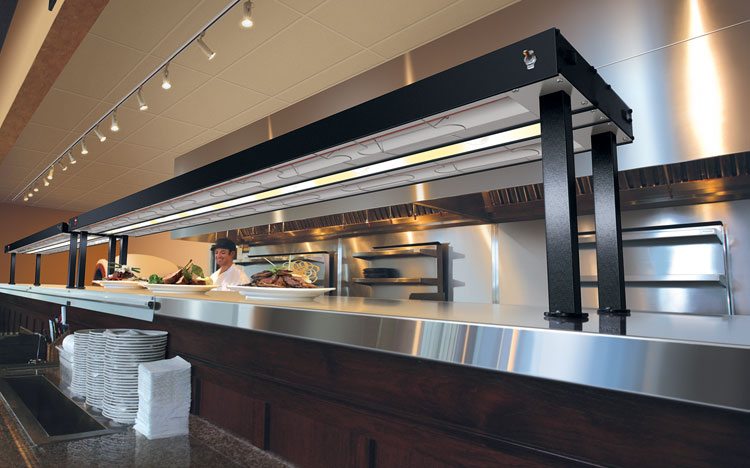
If you’re looking to install multiple heat lamps in a straight line — and want some flexibility to move them side to side — track mounting is a popular solution. Each track represents a single circuit, with the live end of the track connected to a junction box in the ceiling and the dead end mounted in the desired direction along the ceiling. If you’re looking to expand the heating coverage area, you could also mount two tracks parallel to each other. Just make sure to leave enough room between tracks to accommodate the diameter of your heat lamp shades.
Additionally, you’ll want to consult the manufacturer’s product manual to confirm if there’s a certain number of commercial heat lamps permitted per track. For example, Hatco allows up to seven 250-watt or five 375-watt heat lamps on an individual track. Any number of lamps beyond this requires you to add another track. Also, word to the wise — if you want to use a remote wall switch (rather than a switch that’s on the lamp itself) to power an entire track of heat lamps on and off, you should check with the manufacturer. At Hatco, you only have to order one remote switch per track of heat lamps, rather than switches for all the lamps.
Location, location, location
Chances are you already have a good idea of where you want to install your heat lamp or lamps. With that said, it’s important to note that heat lamps are particularly susceptible to ambient conditions. They use radiant heat, which means heat travels from the heat lamp through the air (via infrared energy waves) to the food below. Free-flowing air can easily interfere with this heat transfer, lowering its effectiveness.
As a result, it’s important to “optimize” the location where any heat lamp will live. The best way to do this is to select an ideal location from the beginning that’s away from free-flowing air like drive-thru windows, open doors or air conditioning vents. But the perfect location isn’t always 100% possible; and that’s okay. Closing an open window, blocking a poorly placed cold air supply register, or balancing a hood system will work wonders at eliminating unwanted airflow. Before install time, do a quick check and make any needed tweaks to improve the ambient conditions at your location.
Should your install also include bottom heat?
Heat lamps are specifically designed to keep food warm for brief hold times. If you’re looking to install heat lamps in an area or for a purpose that requires holding food for more than a few minutes, you can always add a bottom (conductive) heat source such as a heated shelf. By adding bottom heat to a heat lamp setup, you’re exposing more surface area of the food you’re holding to heat, therefore extending your hold time and opening up additional holding applications.
On top of extending hold times, installing a bottom heat source is a great way to fill in any heat “gaps.” Commercial heat lamps have a very focused heat pattern that’s typically around 8 inches (203 millimeters) in diameter. This is great for holding individual plates of food or to-go containers. But what about the occasional trays of food? With a heat-lamp-only setup, there will be sections of each tray that fall outside the heating target area. Simply adding a bottom heat source is one way to expand your heating range. Just remember, the addition of another heat source will change your recommended hanging clearances. Therefore, if you want the flexibility to decide when to turn your bottom heat on or off, you should go with a retractable cord style that allows you to adjust your heat lamp hanging heights up or down.
Preparation makes perfect.
When it comes to commercial heat lamps, the devil’s in the details. So much of a successful heat lamp installation has to do with finding the best solution from the beginning — a solution that has the electrical characteristics, shade style, colors, finishes, mounting style and heights, dimensions, and more that you want and need for your space.
If you’re still exploring heat lamp options, we encourage you to learn all you can before making a purchase. Start by downloading our Buying Guide for Hatco Commercial Decorative Lamps. And once you’re ready to buy, be sure to use our handy Build-a-Lamp tool to ensure you’ve considered and included all of the customization options and ordering requirements needed to get the best solution for your space. Click here to build your custom lamp today!