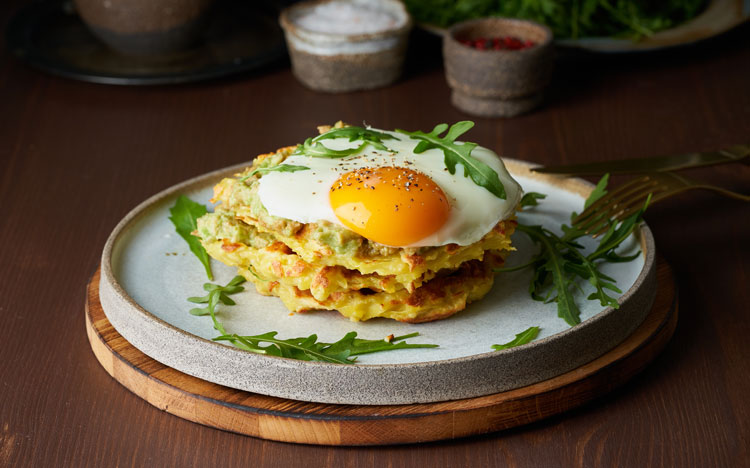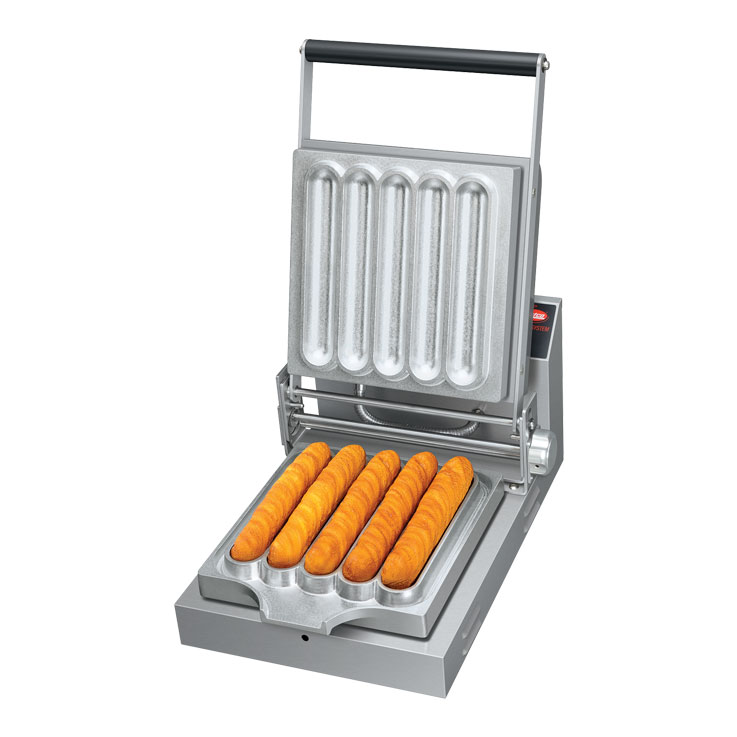
Hatco has teamed up with fellow manufacturer Suntec to create the ultimate crowd-pleasing, money-making machine, the Hatco/Suntec Snack System. With a single piece of equipment, you can serve up endless tasty delights for breakfast, lunch, dinner and everything in between.
Equipped with up to seven plate sets — Belgian Waffle, Freestyle, Coffee Bean, Sandwich, Panini, Donut and Chelky — the Snack System can add variety to every menu. Come up with unique recipes of your own or give these tried-and-true Snack System favorites a whirl. There’s something for every palate and every plate!
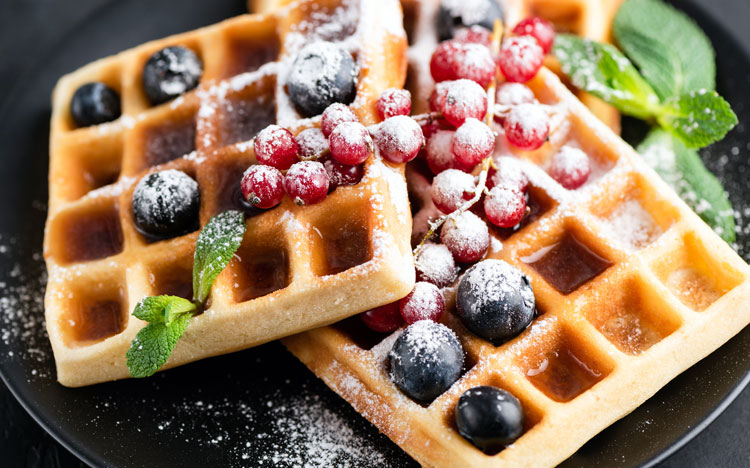
Billy Booster’s Waffles
Serves: 4
Plates: Belgian or Freestyle
Temperature: 370°F (190°C)
Time: 3 minutes and 30 seconds
Power setting: 10
Ingredients:
- 3 large eggs
- 1½ cups milk
- 1 teaspoon apple cider vinegar or white distilled vinegar
- ½ cup canola oil
- 1 teaspoon vanilla extract
- 1 tablespoon granulated sugar
- 1¾ cups all-purpose flour
- ¼ teaspoon salt
- 2 teaspoons baking powder
- 1 teaspoon baking soda
- Food release spray or vegetable oil
- Maple syrup or other tasty toppings
Directions:
- Install desired Snack System plates.
- Program or select preset at the recommended temperature, time and power setting.
- Preheat Snack System.
- In a large bowl, whisk together the eggs, milk, vinegar, oil, vanilla and sugar until creamy.
- Add the flour, salt, baking powder and baking soda. Mix until combined, taking care not to overmix.
- Coat plates with a food release agent.
- Ladle in enough batter to fill the bottom plate.
- Close the Snack System and press “start.” When the beeper sounds, press “end” and remove the waffle. Drizzle with syrup or other toppings. Serve immediately.
Breakfast Cakes
Serves: 15
Plates: Coffee Bean or Donut
Temperature: 340°F (170°C)
Time: 4 minutes
Power setting: 08
Ingredients:
- 2½ cups all-purpose flour
- 2½ teaspoons baking powder
- ¼ teaspoon salt
- 1⅓ cups granulated sugar
- ¾ cup butter, softened
- 1½ teaspoons vanilla extract
- 3 eggs, room temperature
- 1¼ cups milk
Directions:
- Install desired Snack System plates.
- Program or select preset at the recommended temperature, time and power setting.
- Preheat Snack System.
- Combine flour, baking powder and salt in a bowl. Mix together and set aside.
- In a separate bowl, beat sugar and butter on medium speed until light and fluffy, scraping down sides of bowl as needed.
- Beat in vanilla and eggs.
- Slowly add in a third of the flour mixture, followed by a third of the milk. Continue alternating until gone, beating well and scraping down the sides after each addition.
- Using batter dispenser, fill each “bean” on the lower plate with batter until just below half full.
- Close the Snack System and press “start.” When the beeper sounds, press “end” and remove the individual “beans.” Serve immediately.
Ham and Cheese “Toasty” Sandwich
Serves: 1
Plates: Sandwich
Temperature: 340°F (170°C)
Time: 3 minutes and 30 seconds
Power setting: 10
Ingredients:
- 2 slices of white bread
- 2 slices of smoked ham
- 2 slices of Swiss cheese
- Mustard to taste
- Mayonnaise to taste
- Food release spray or vegetable oil
Directions:
- Install desired Snack System plates.
- Program or select preset at the recommended temperature, time and power setting.
- Preheat Snack System.
- Sandwich the ham and cheese between the bread, alternating layers.
- Add mustard and mayonnaise to taste.
- Coat the plates with food release agent.
- Close the Snack System and press “start.” When the beeper sounds, press “end” and remove the sandwich. The edges of the bread should be sealed shut, creating a delicious handheld snack! Serve immediately.
Caprese Panini
Serves: 1
Plates: Panini
Temperature: 375°F (190°C)
Time: 2 minutes
Power setting: 10
Ingredients:
- 2 slices of sourdough bread
- 2 slices of fresh buffalo mozzarella
- 1 small tomato, thinly sliced
- 10 basil leaves
- 2 tablespoons olive oil
- 1½ teaspoons balsamic vinegar
- Salt and pepper to taste
Directions:
- Install desired Snack System plates.
- Program or select preset at the recommended temperature, time and power setting.
- Preheat Snack System.
- Brush the olive oil on the outside of the bread.
- Between the bread, assemble a layer of mozzarella, tomato and basil.
- Drizzle the mozzarella, tomato and basil with balsamic vinegar and season with salt and pepper. Add the top piece of bread to close the panini.
- Close the Snack System and press “start.” When the beeper sounds, press “end” and remove the panini. Slice in half and serve immediately.
Chelky Bars
Serves: 10
Plates: Chelky
Temperature: 310°F (155°C)
Time: 6 minutes
Power setting: 10
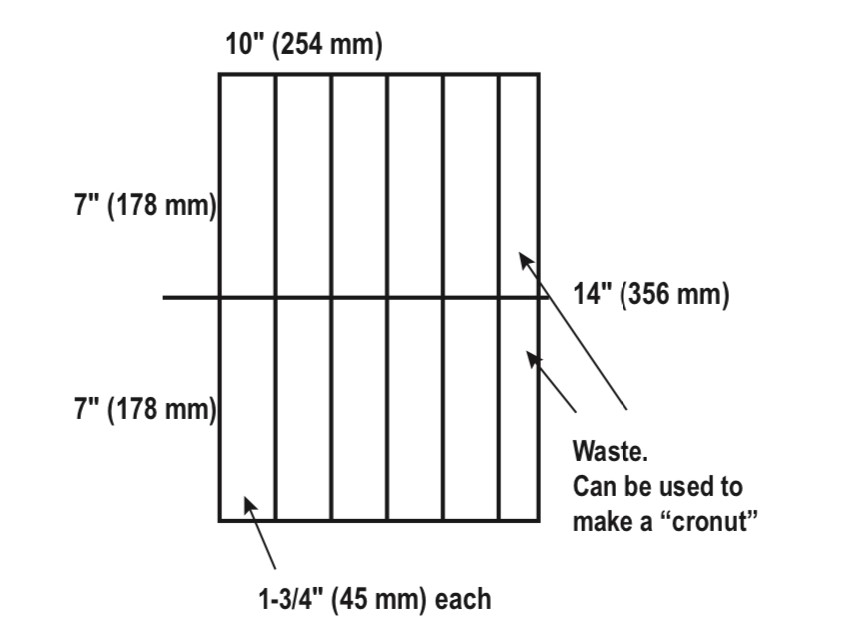
Ingredients:
- Frozen croissant dough, enough for 2 sheets measuring 10” x 7” (254mm x 178 mm) each
- Fine crystalline sugar (optional)
- Powdered sugar (optional)
Directions:
- Install desired Snack System plates.
- Program or select preset at the recommended temperature, time and power setting.
- Place sheet of frozen dough on a pan or cutting board under parchment paper at room temperature for 30 minutes.
- Cut dough into 2 sheets that are 10” x 7” (254mm x 178mm) each.
- Cut into 5 strips, each 10” x 1¾” (254 mm x 45 mm) [see cutting diagram below].
- Fold each strip in half lengthwise, so each strip is ⅞” (22.5 mm) wide. If necessary, use a little water to stick folded sides together.
- Hold one end of the strip taut and twist the bottom 3 or 4 times.
- Proof twisted dough under parchment paper for 1½ to 2 hours at room temperature (no more than 80 °F / 27 °C), until dough doubles in size.
- Preheat Snack System.
- For a sweeter Chelky bar, dredge twisted dough in fine crystalline sugar (optional).
- Place dough in Chelky plate, reshaping gently.
- Close the Snack System and press “start.” When the beeper sounds, press “end.”
- Remove Chelky bars with a skewer and place on cooling rack. Allow to cool.
- Dust with powdered sugar (optional).
Cutting diagram
The Swiss Army knife of foodservice equipment.
With one compact piece of equipment, you can provide customers with an endless stream of exciting menu options. Rolling out of breakfast and looking for some quick snack options? Pop your waffle plates off and swap in a plate of your choosing. Or, leave ‘em on and enjoy breakfast all day! For more information on the Hatco/Suntec Snack System, visit our website today.